A pickup upgrade on my Dean guitar that I’ve always wanted to do. I’ve posted pictures here.
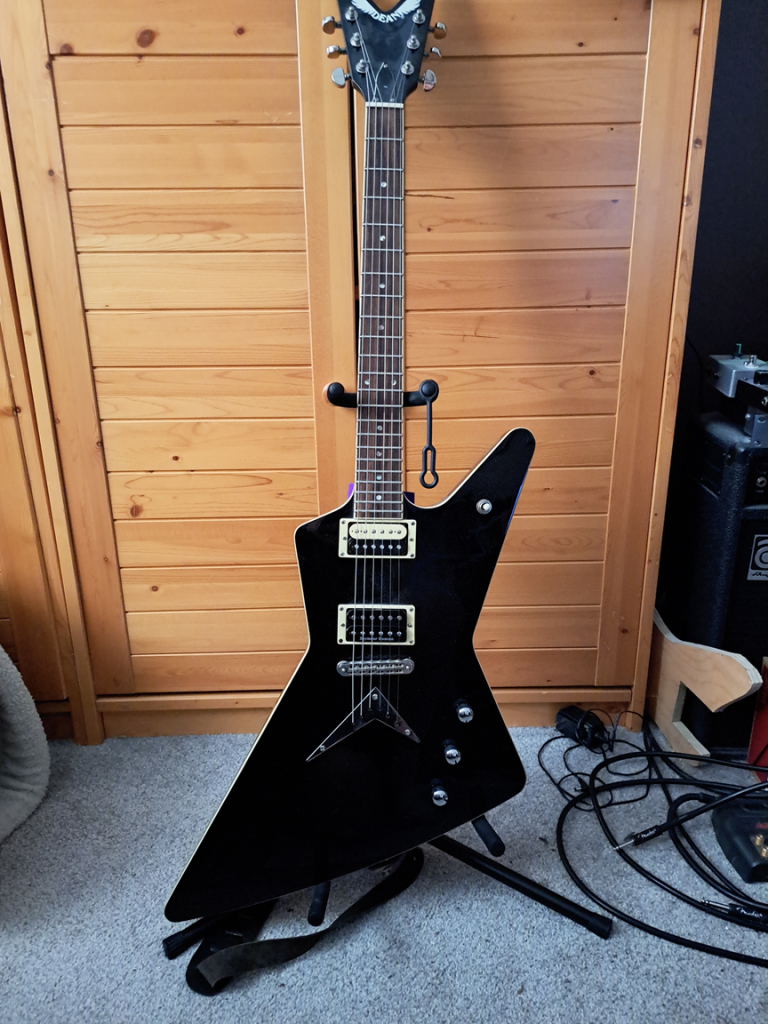
Dean 79 Z
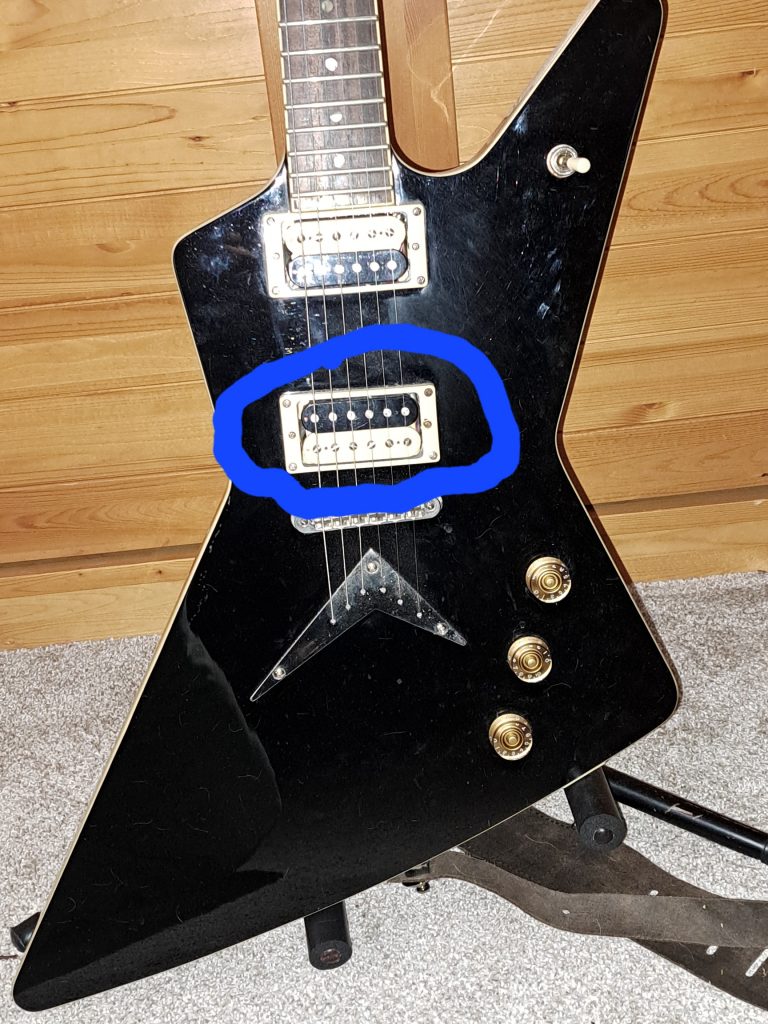
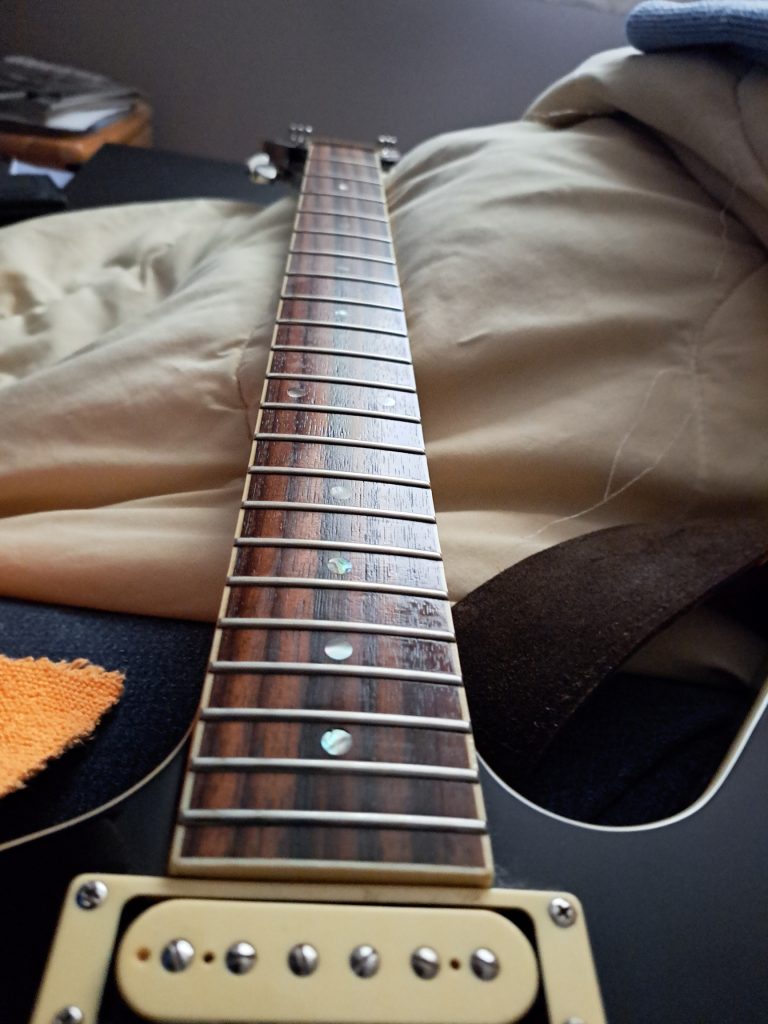
The bridge pickup (blue circle) on this guitar is what shall be replaced this month. Also, as you can see this guitar needs some cleaning as well.
Seymour Duncan JB TB-4 Trembucker pickup
This pickup is what will replace the old Zebra pickup that came with this guitar when I purchased it.
First things first we take the strings off and take a look at where this guitar needs cleaning.
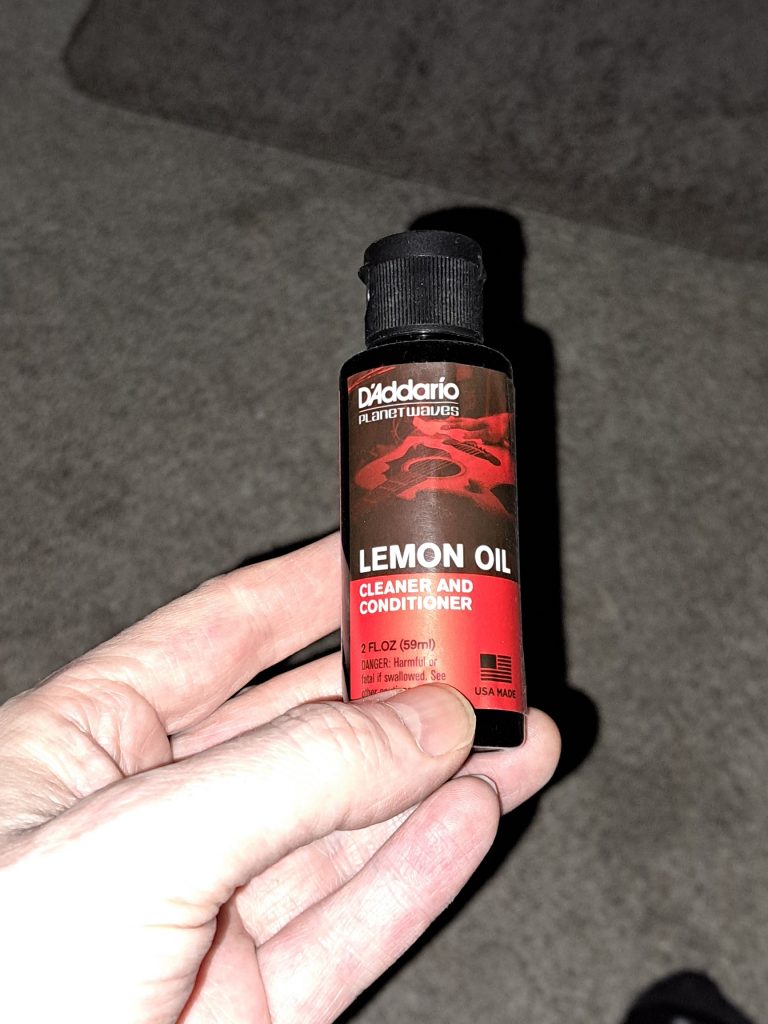
This lemon oil will be used to clean off the dirt and grime on the rosewood fretboard.
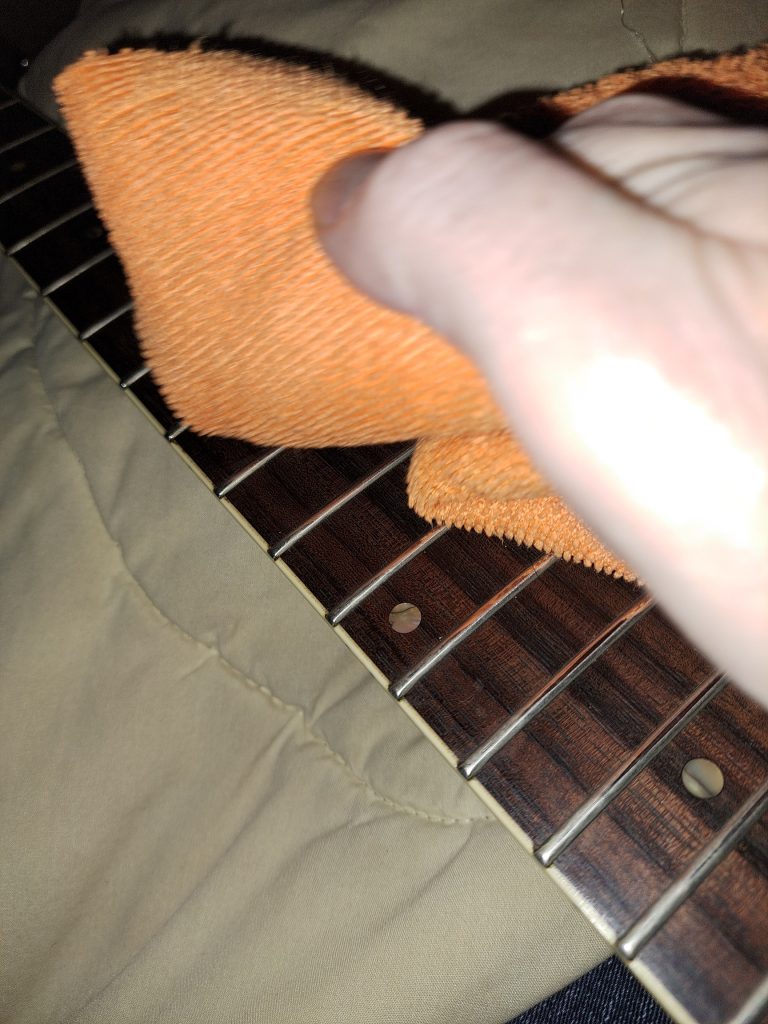
Doesn’t take much just a few dabs on a dry cloth and work your way up and down the fretboard.
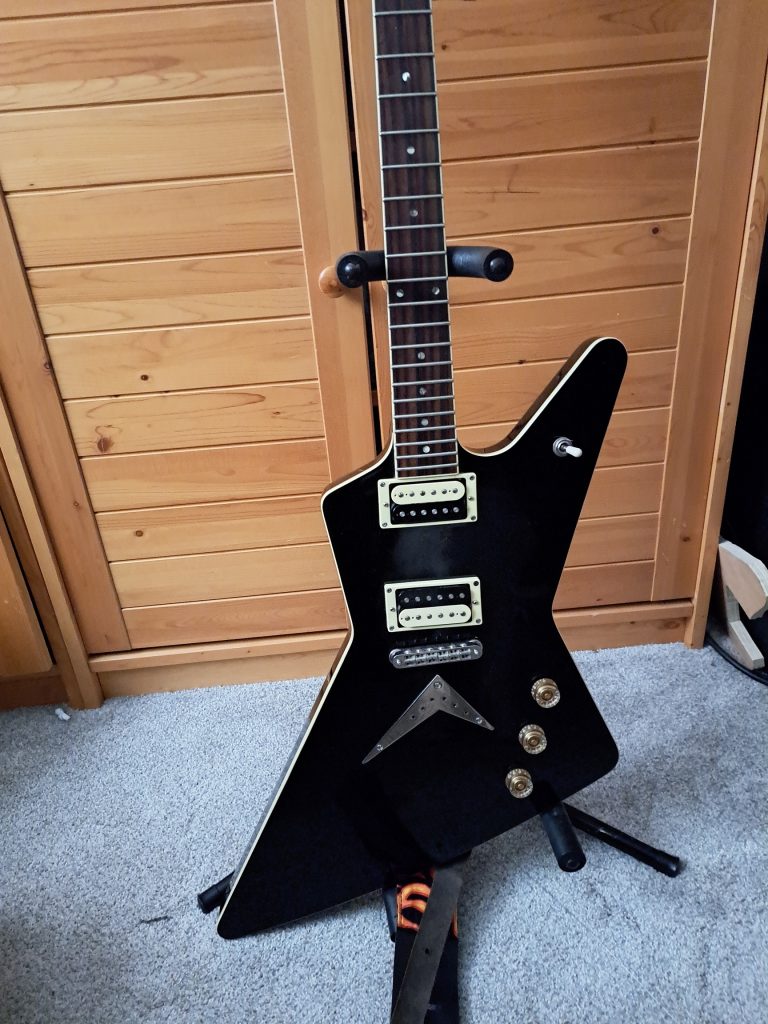
See how shiny it looks now. Next were going to clean of the body with a micro-fiber cloth and water.
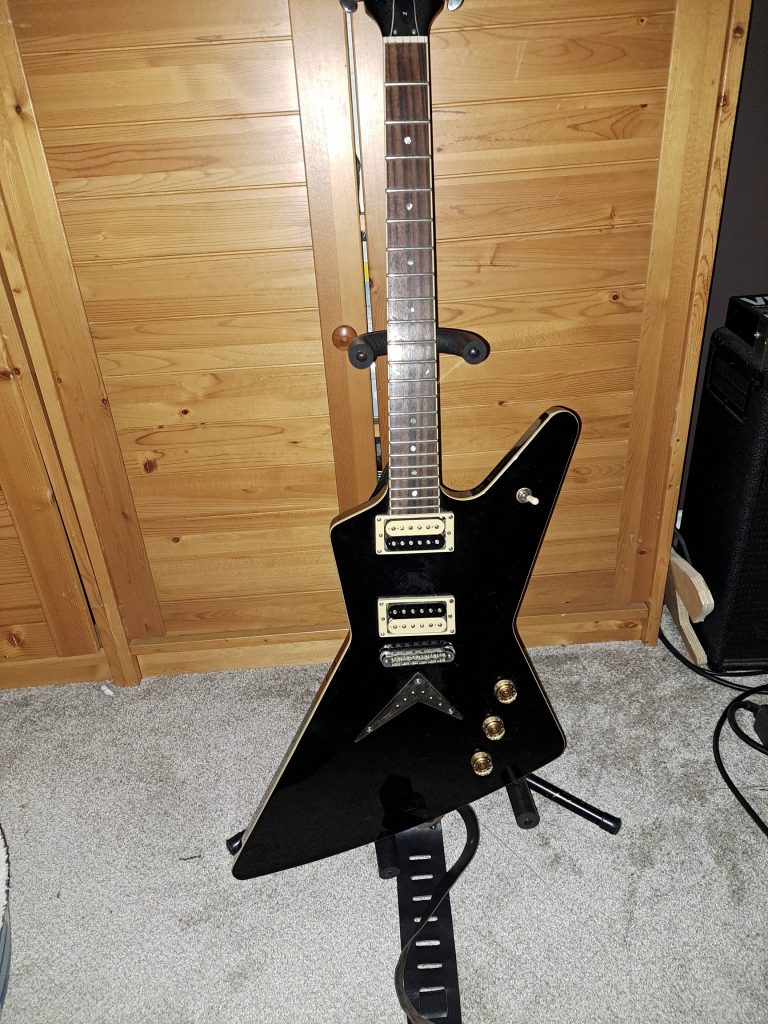
Clean Dean Guitar
This is what it’s like after a cleaning removing dust and fingerprints.
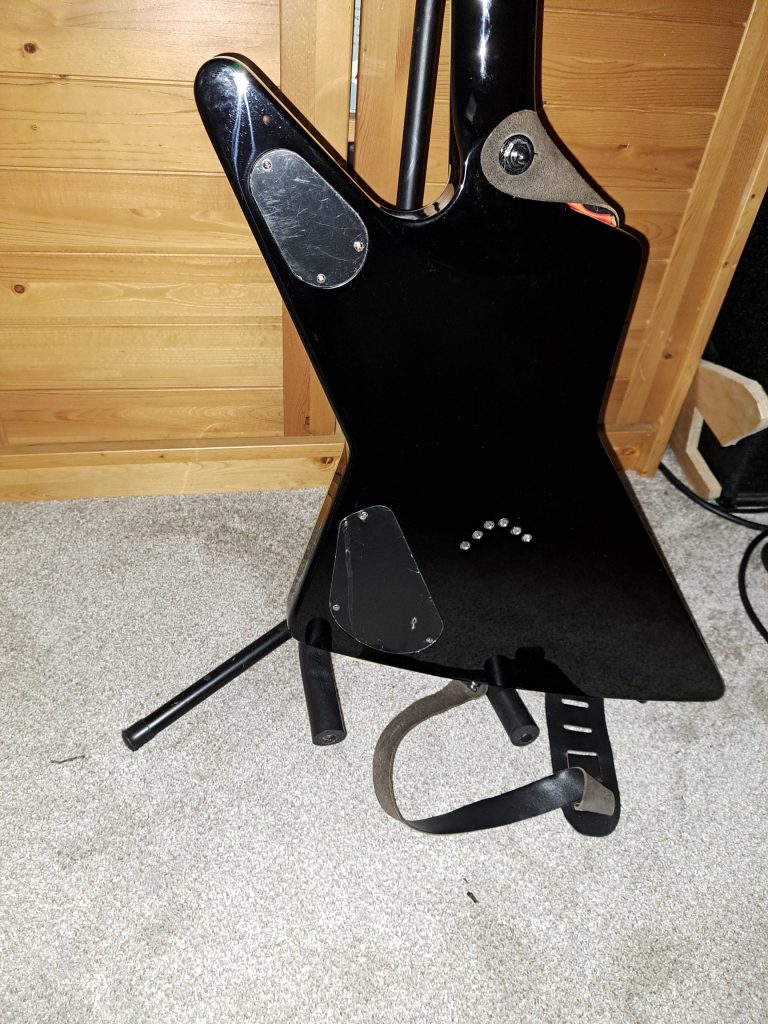
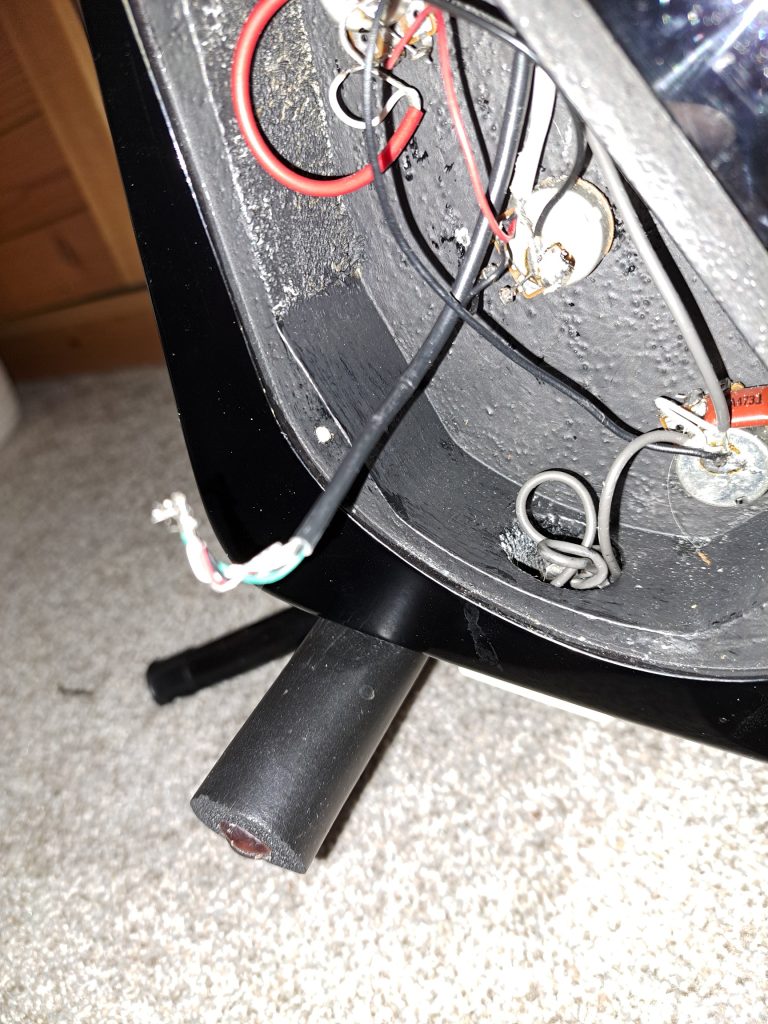
This is the back side of my guitar. The two panels will be removed.
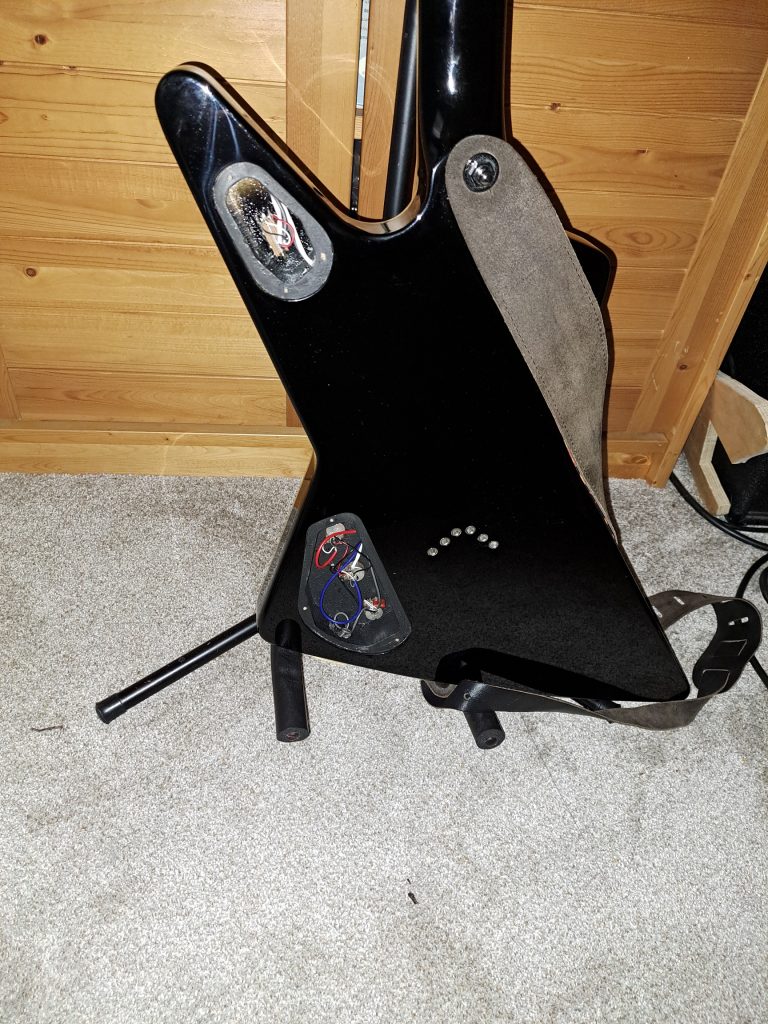
Here you can see the two back panels removed showing guts of the guitar.
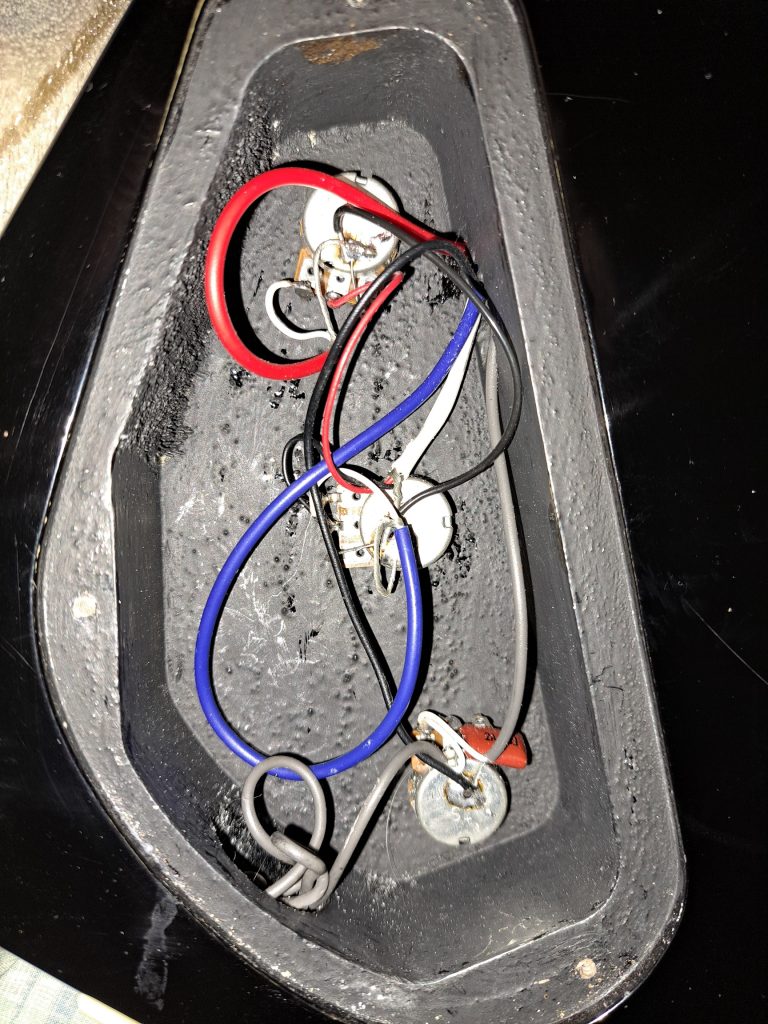
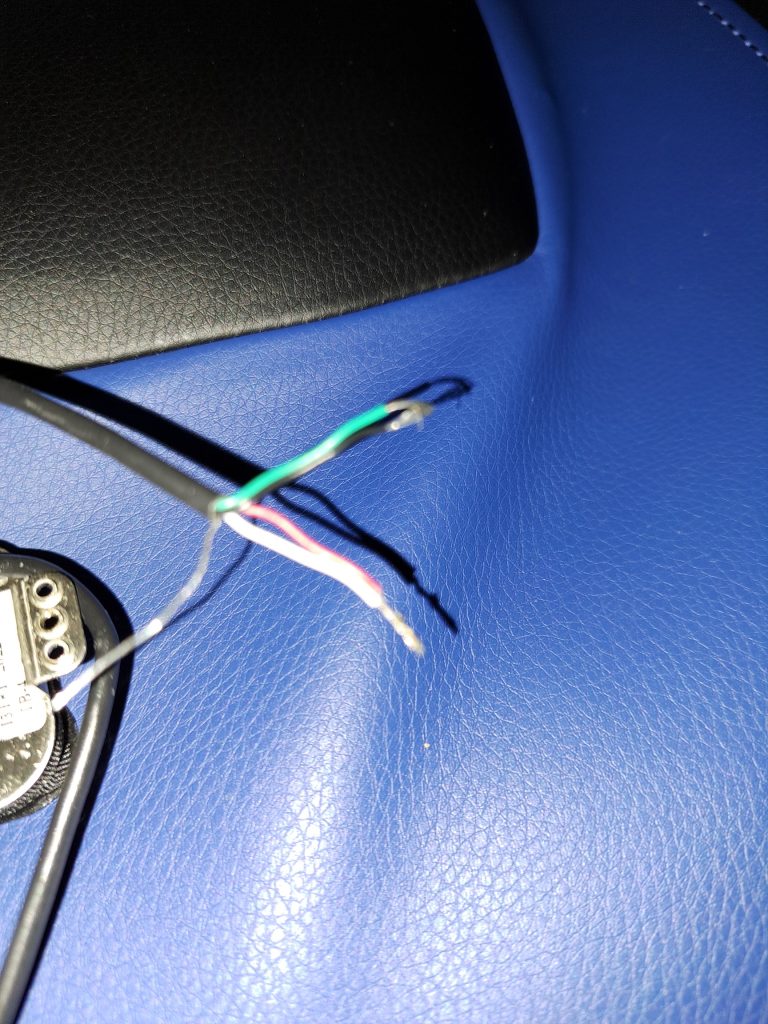
Here is the main panel showing the neck pickup control wires (red), the bridge control pickup wires (blue) and tone control wires (grey). We will disconnect the blue wires with a solder gun after removing the pickup screws on the other side.
Here is the old bridge pickup removed.
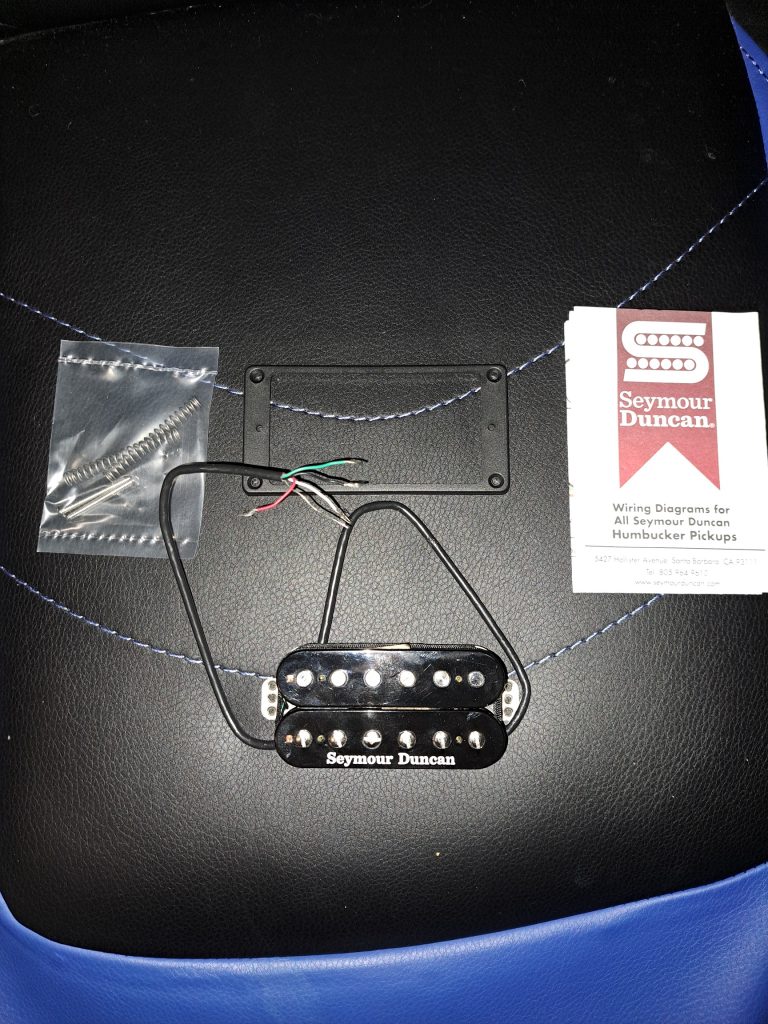
Here is the New Humbucker Pickup kit.
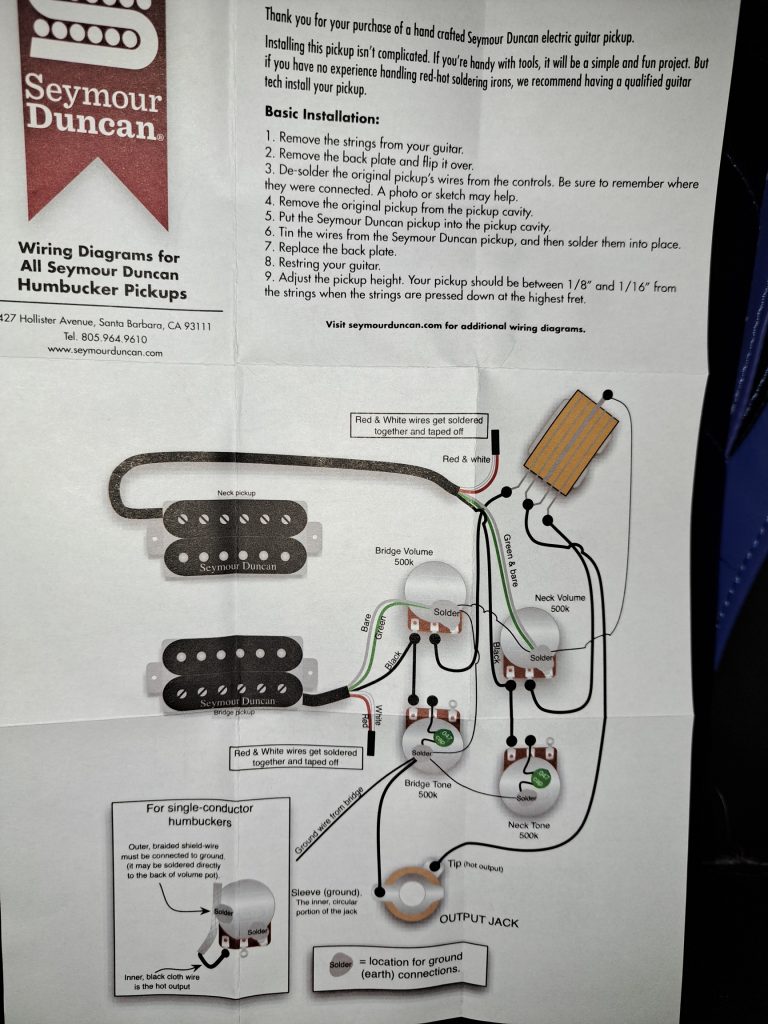
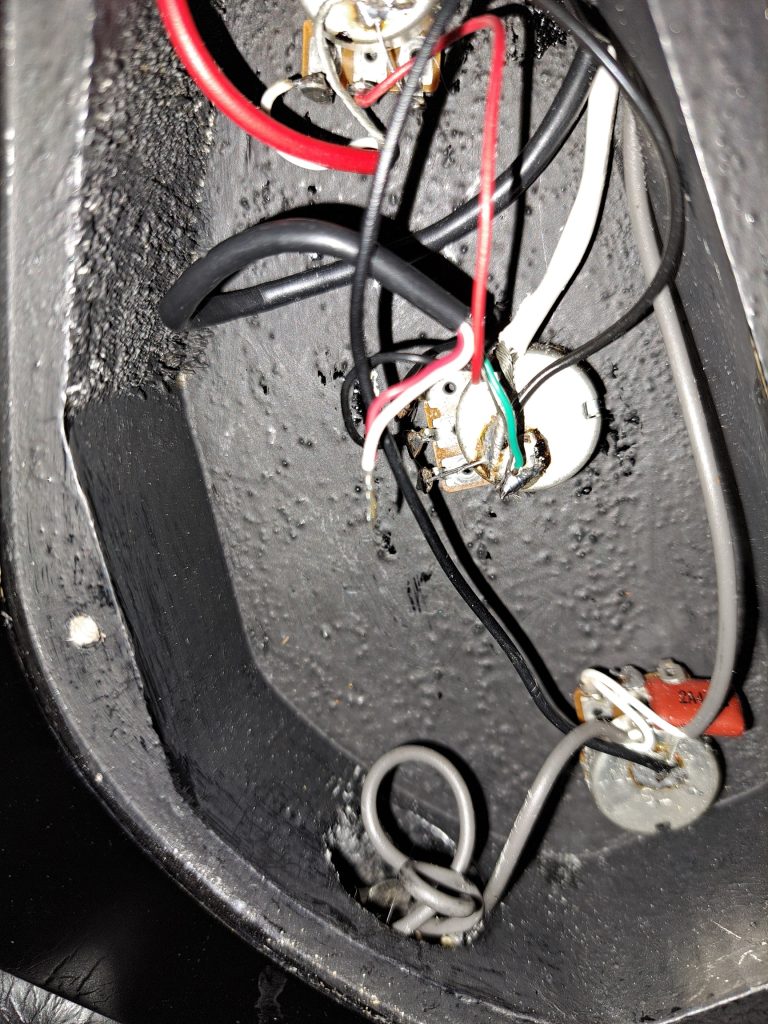
According to the wire diagram, we need to connect the silver, green and black wires to the bridge volume pot.
Here’s the new pickup wires. The red and white wires are put together and taped off and the silver and green wires will solder on the bridge pot.
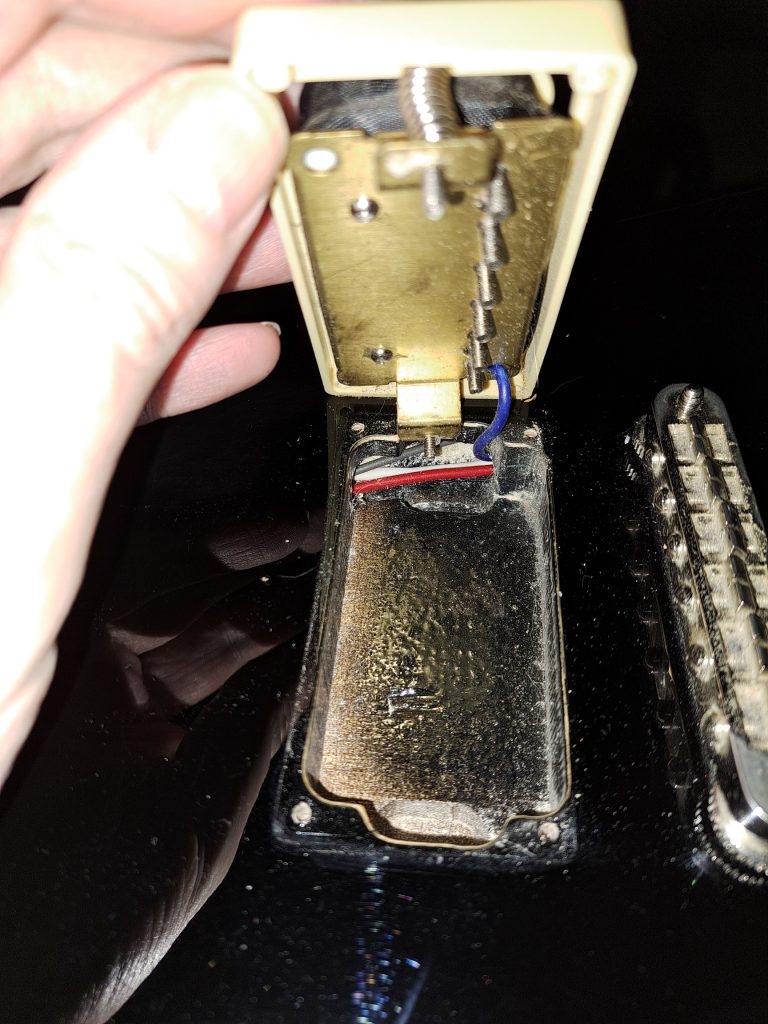
Here is the pickup wire fed through the body out the back of the guitar.
Wires are soldered and ready to rock!!!.
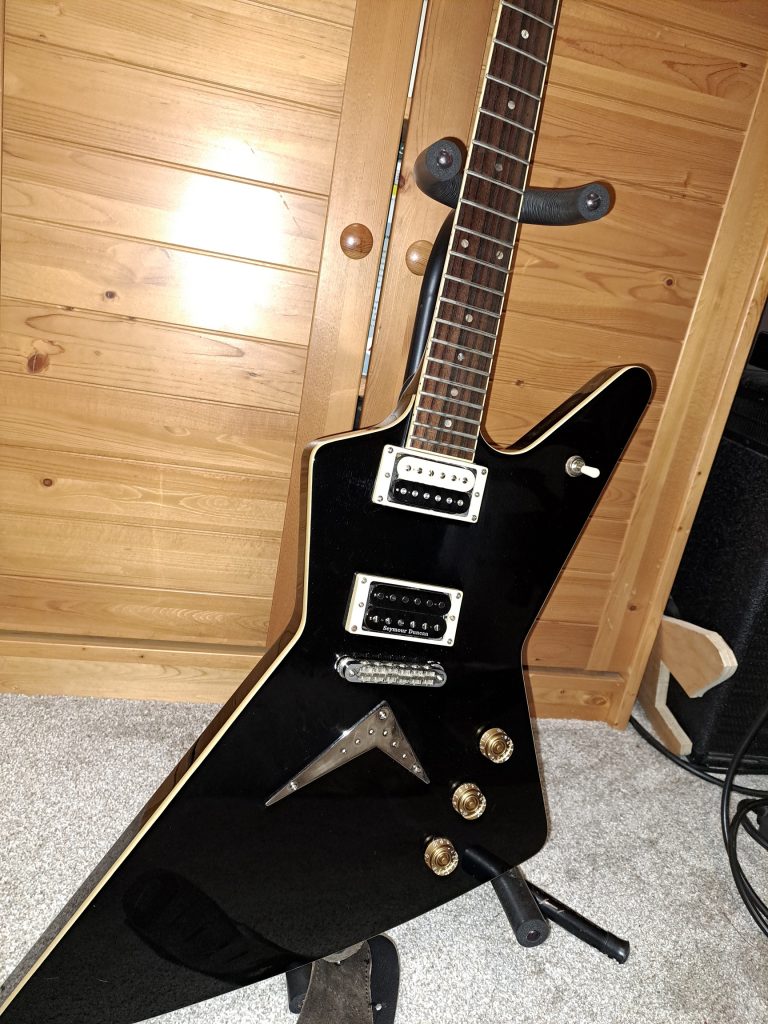
And here we have it complete.
Here it is again. Well add some strings and test it out.
*UPDATE*
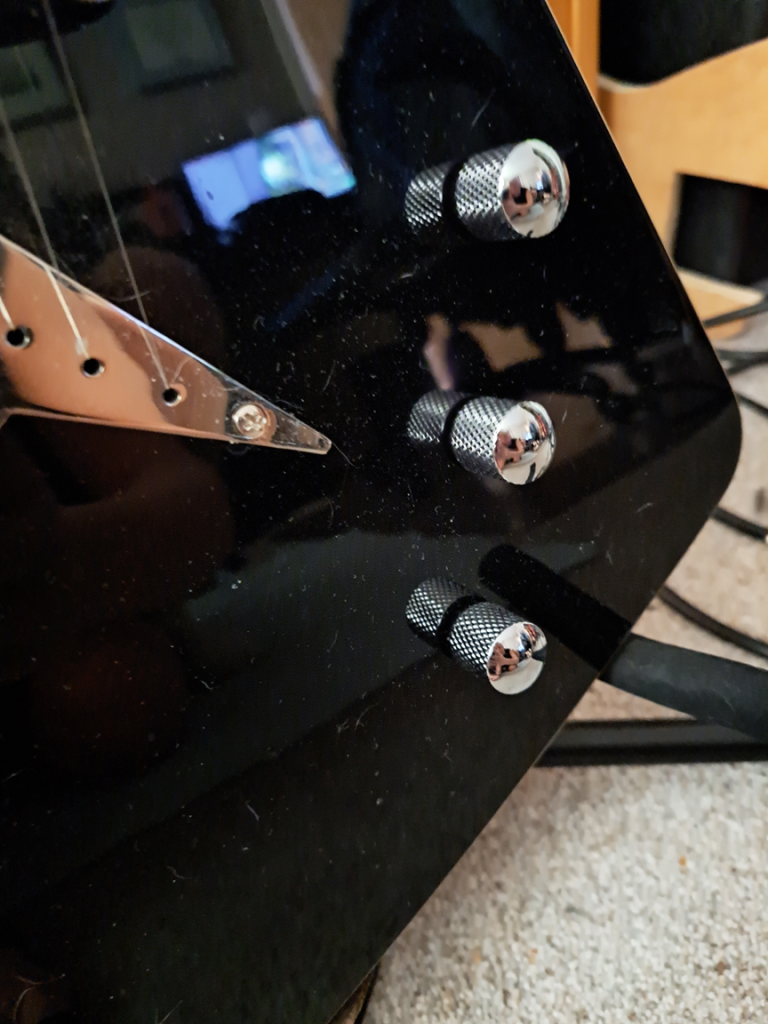
Replaced old knobs with chrome knobs off Amazon.
And here is a better picture complete.
Dean + Lizard King + CE-1
Project# 1
My first guitar that was heavily used back in the 80’s. I’ve posted pictures here.
Series-A-before-photo
This guitar hasn’t seen the light of day in many years.
This is what my guitar currently looks like after years of abuse and mistreatment
20220218_104849
As you can see this needs a lot of customization.
Dry fit pickups, wires and controls.
20220219_234832
I will be cutting and shaping this pickguard material once I receive my new bridge
This is pickguard material that i ordered off Amazon.
20220219_235329
As you can see the pickguard has 3 layers pressed together adding a kind of Oreo cookie effect. Hopefully I can find a bevel cutter to use this effect.
3 ply pickguard material edge.
20220223_001117
Here is the new bridge.
This is the bridge I ordered which will be measured and mounted so we can move forward. I will add more photos as we go.
20220224_043407
Bridge mounted to guitar body.
Mounted the bridge now here’s where the fun begins…
20220224_103620
Clear plastic template.
Traced and cut out a plastic template for the pickguard.
20220224_130851
I traced and cut out a wood template using the clear plastic template. It’s not perfect but we can make adjustments before cutting the actual pickguard. I used a Jigsaw to make the cut.
20220224_130712
It Fits! I will use this wood template to cut the finally pickguard.
20220308_091937
Cut out the pickguard material using a jigsaw, hacksaw and dremel using the wood template I made as a guide. Looks pretty rough right now but I will be detailing for the next task using light sandpaper to smooth out any rough edges
20220309_095233
Here’s the Bridge Pickup fitted into the Bridge. These are Fender TexMex Telecaster Pickup’s “…that can go from clean to mean and everything in-between”.
20220402_224518
Used a Dremel to drill out the Pickguard Neck Pickup hole. Just needs a little file action to smooth things out.
control_panel_template
This paper cutout will be used as a template to cut a hole for the Control Panel.
control_panel
We will trace the Template with a marker and later cut into the Guitars pickguard and body so we can fit the Pre wired Control Panel. We will use a Jigsaw.
Control_Panel_Cutout
Used a combination of Jigsaw and chisel to cut out the location for the Control Panel.
Guitar_Components_without_pickguard
The Control Panel fits yay!
Dryfit_Components
Here is everything up till now. Used tape to hold parts in place temporarily. Next were going to drill holes into pickguard to add screws instead of tape. Also need to order an input panel for a guitar cable.
20220918_093701 – Copy
This came in the mail today.
20220922_125607
Input Panel is complete.
Guitar_Ground_wire
This small black wire is the ground wire feeding through under the bridge. This wire helps eliminate unwanted noise or buzzing sounds.
20221003_103146
Just need to put some strings on and adjust the action and intonation.
Mosaic NoodlingDrums + 2Guitars + BassBadder Monkey Jam